.svg)
How to Automate Your Webflow Marketing with Zapier
Turn Your Webflow Site into a Lead-Gen Machine with No-Code Zapie
.avif)
TLDR :
- Connect Webflow forms to your CRM, Slack, email & more with Zapier
- Automate lead management, email marketing, and reporting
- Save hours of manual work each week
- Set up custom Zaps without touching code
- Scale your marketing workflows effortlessly
1. Introduction: What is Zapier?
Did you know you can send leads from your Webflow website straight into HubSpot, get notified on Slack, and add them to your Mailchimp list—all without writing a single line of code?
If you're managing marketing for a Webflow site, you're handling forms, CRMs, email newsletters, analytics, and a spreadsheet or two. And if you're doing all that manually, you’re spending time where you shouldn’t have to.
Managing marketing for a Webflow site often involves juggling forms, CRMs, email newsletters, analytics, and multiple spreadsheets. Automating these tasks can free up valuable time that would otherwise be spent on manual processes.
That’s where Zapier comes in.
Zapier is essentially an API connector. It connects your tools and gets repetitive work done in the background, without needing a developer. Webflow and Zapier work well together, allowing marketers to automate everything from form submissions to campaign tracking, follow-ups, and data logging.
In this guide, we'll explore how to integrate Webflow and Zapier to build powerful marketing workflows that run on autopilot.
2. Understanding Webflow and Zapier
Before we explore the workflows, let’s quickly get on the same page about these two tools.
What is Webflow?
Webflow is a powerful no-code platform that lets you build websites visually—without relying on traditional front-end developers. From landing pages to full-fledged CMS-based marketing sites, Webflow empowers marketers to control design and publishing, while still offering clean HTML, CSS, and JavaScript under the hood.
It’s especially popular among marketing teams because it:
- Speeds up launch cycles
- Gives non-tech teams control over their website
- Supports CMS-driven content like blogs, case studies, and landing pages
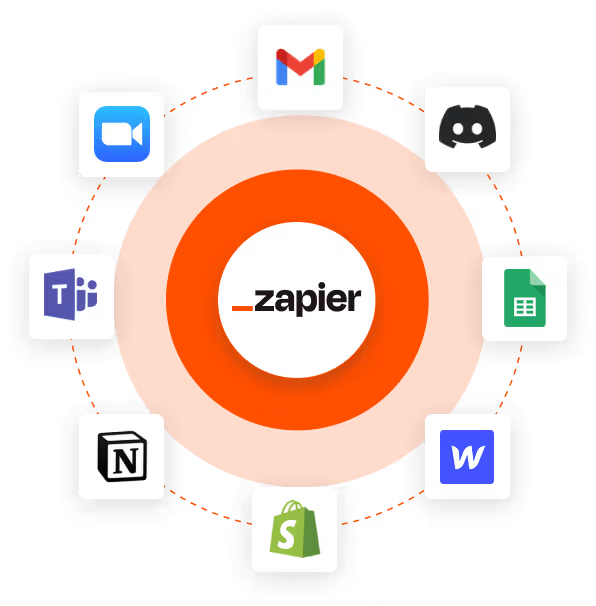
What is Zapier?
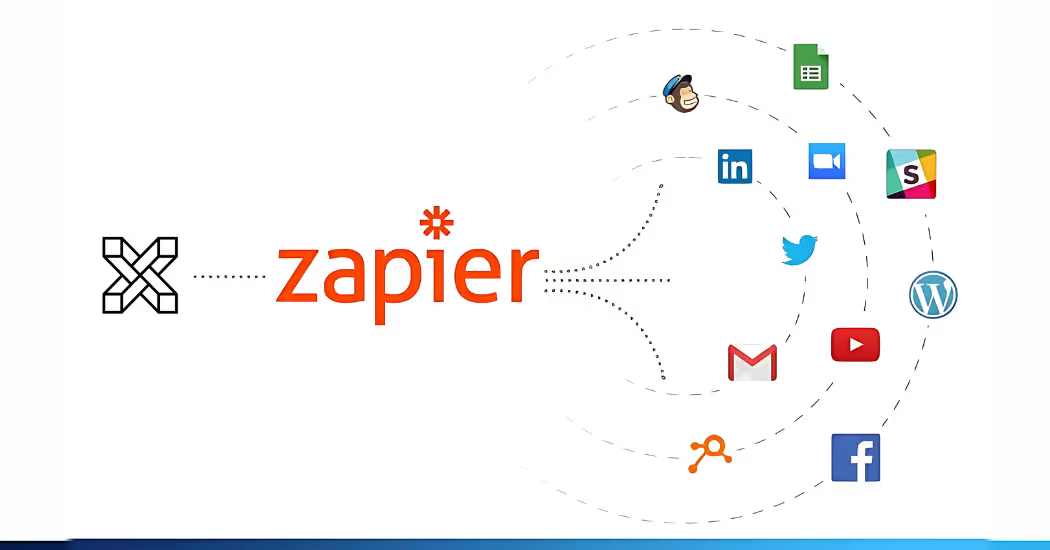
Zapier is an automation platform that connects over 7,000 web apps—think of it as a glue that binds all your tools together. You can create “Zaps” (simple workflows) that automate tasks across platforms. For example, when someone submits a Webflow form, Zapier can automatically:It acts as a connector, linking your various tools. You can set up "Zaps" (straightforward workflows) to automate tasks across different platforms. For instance, if a Webflow form is submitted, Zapier can automatically:
- Send them a welcome email
- Add their contact details to HubSpot
- Notify your team on Slack
- Update a row in a Google Sheet
And all of this happens behind the scenes, instantly.
How Webflow and Zapier Work Together
Zapier taps into Webflow’s forms and CMS features to trigger actions in other tools. For marketers, this means you can connect your lead generation, email marketing, analytics, and project management workflows—without ever needing to touch code or write custom integrations.
Here’s a real-world scenario:
A user fills out a contact form on your Webflow site.
→ Zapier captures that submission in real-time.
→ The user is instantly added to your Mailchimp list.
→ Your sales team gets a Slack notification.
→ The lead is automatically logged into Airtable or your CRM, like HubSpot.
That’s just one workflow—but it shows the potential when you connect Webflow and Zapier smartly.
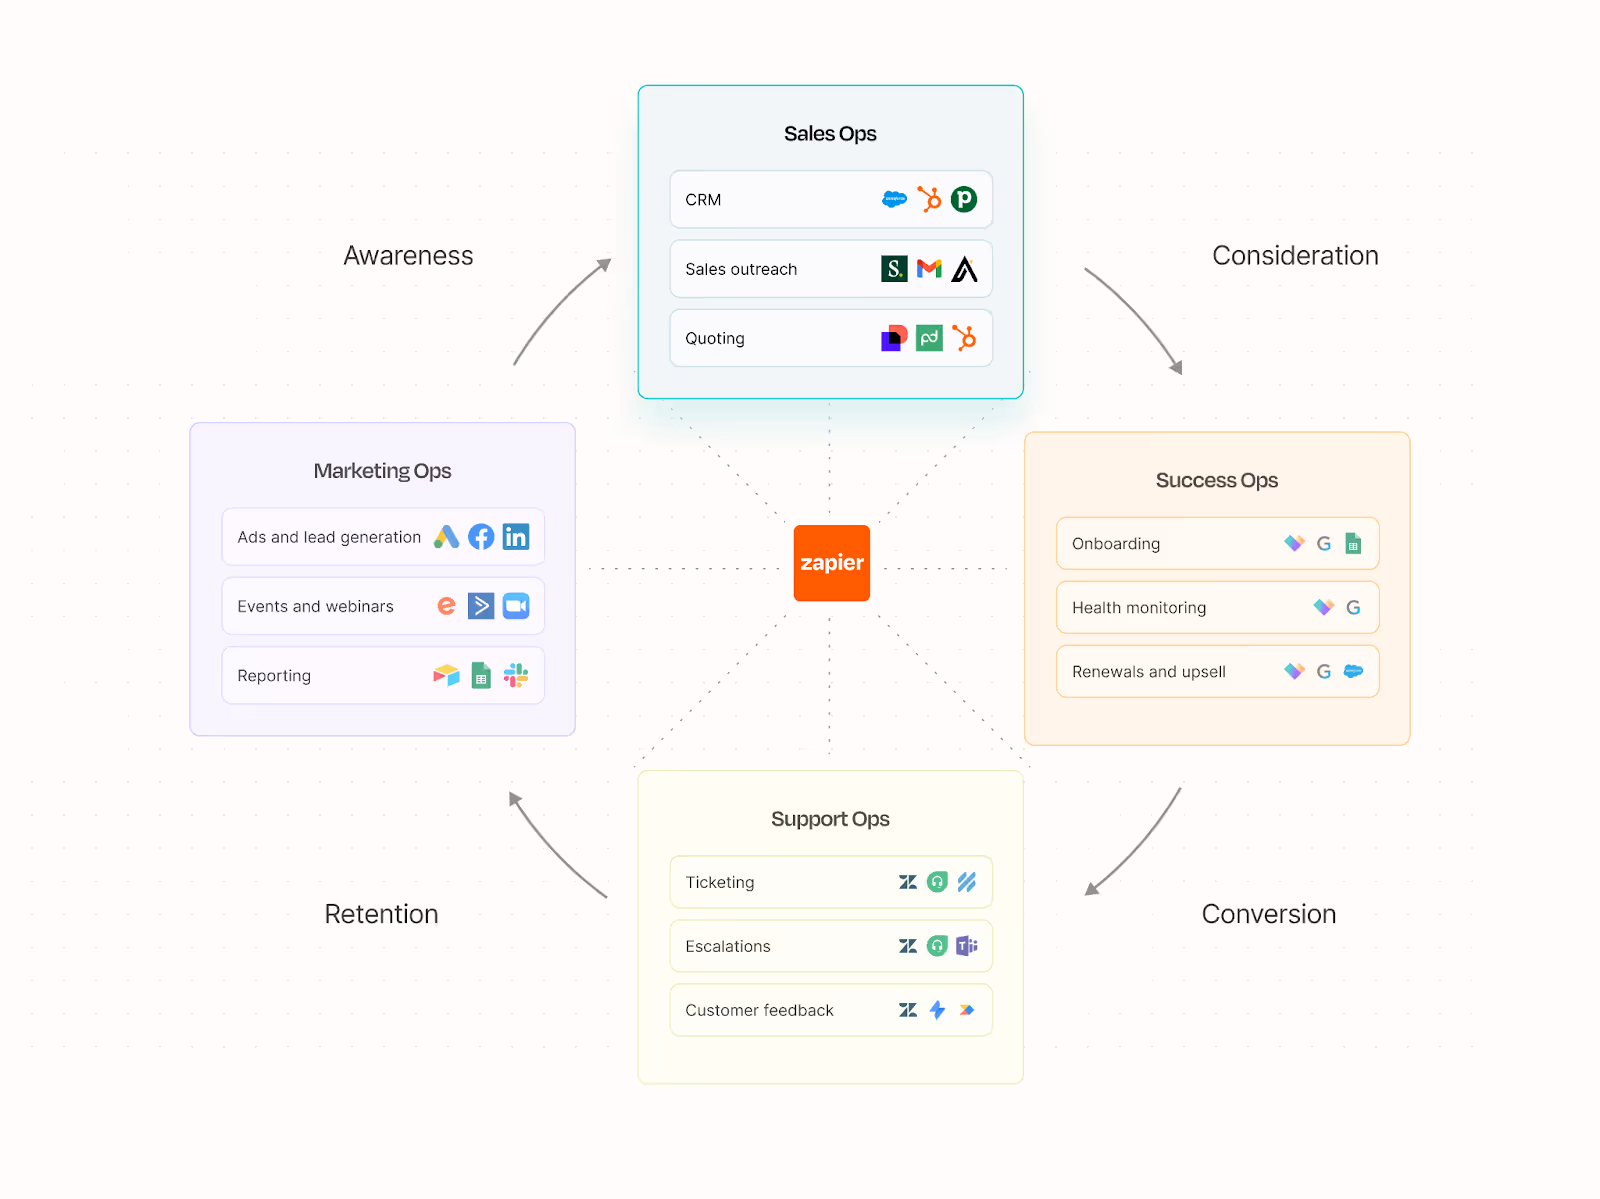
3. Key Marketing Workflows to Automate
Here’s where things really get powerful.
Once you connect Webflow to Zapier, you unlock a whole new level of efficiency for your marketing team. Instead of jumping between tabs, copying and pasting data, or worrying about missed follow-ups, you can let automation handle it all.
Let’s explore the kind of workflows you can (and should) be setting up:
- Lead Generation & Management

The moment someone fills out a form on your Webflow site, that data shouldn't just sit there. You can instantly:
- Send the lead to your CRM—whether you use HubSpot, Salesforce, or Zoho.
- Ping your team on Slack or via email with all the lead details.
- Log the submission in a Google Sheet or Airtable, so your data stays organised and ready for reporting.
No more “just checking if the lead came through” messages. Your team is always in the loop.
P.S. - Zapier offers a comprehensive course on Automating Lead Generation.
- Email Marketing

You can build seamless email workflows without lifting a finger:
- Automatically add new leads to Mailchimp, Klaviyo, or ConvertKit.
- Trigger welcome sequences, send out gated PDFs, or start a drip campaign—all based on the form someone submitted.
- Want to personalise things further? Use Zapier to tag leads based on their behaviour or source (such as which landing page they converted from).
It’s like having a marketing assistant that never sleeps.
- Ad Campaign Syncing

If you're running paid ads, this will be a great asset.
- Automatically sync leads from Webflow with Meta or Google Ads as custom audiences, so your retargeting stays up-to-date.
- If someone fills out a high-intent form (such as a demo booking), Zapier can instantly alert your team on Slack.
- You can also tag leads based on UTM parameters, helping you track which campaigns are actually converting.
Imagine closing the loop between your ad spend and lead capture—without any manual steps.
- Content Distribution

Publishing content is only half the job. With Webflow CMS + Zapier, you can:
- Auto-share new blog posts to LinkedIn, Twitter, and Facebook as soon as they go live.
- Notify your internal team on Slack to boost early engagement.
- Or even log content links to Notion so everything stays centralised.
One blog post → distributed everywhere. Simply click "Publish" and Zapier takes care of the rest.
- Customer Feedback & Engagement

You can turn form submissions into a feedback loop:
- Send automated survey links via Typeform or Tally. So, after someone signs up, downloads, or makes a purchase.
- Let customers submit testimonials that automatically populate into your Webflow CMS.
- Trigger follow-up emails 24 hours post-purchase, asking for reviews or referrals.
It’s all about creating touchpoints—without manually tracking each one.
- Webinar & Event Sign-Ups

Running an event or webinar? Automate the entire registration journey:
- When someone signs up on your Webflow page, automatically register them to Zoom, Livestorm, or Eventbrite.
- Fire off confirmation and reminder emails through Gmail, Outlook, or your ESP.
- Keep a log of RSVPs in your CRM or Airtable for easy follow-up later.
No more chasing people down or wondering who got the link.
- Reporting & Analytics

Let your data work for you:
- Auto-log all form submissions, page views, or campaign responses into Google Sheets for real-time dashboards.
- Set up weekly Slack reports that summarise new leads, conversions, or CMS activity.
- Trigger custom actions based on visitor behaviour—like if someone visits a pricing page but doesn’t submit a form (using Webflow + GA4 events).
You get insights without lifting a finger.
The best part? All of this runs behind the scenes. You just set it up once, and your marketing machine keeps rolling.
Ready to build your first Zap? Let's move on to setting it up.
4. Benefits of Webflow + Zapier Automation for Marketing
By now, you're probably already imagining a few workflows you'd love to automate. But just in case you're still wondering why this matters—here’s what automating your marketing workflows with Webflow and Zapier really brings to the table:
Save time (a lot of time)
No more copying leads into spreadsheets. No more remembering to follow up or tag someone in Slack. Zapier handles tasks like John Wick handles guns—relentlessly.
Reduce lead leakage
Leads slipping through the cracks? Not anymore. With automation, every form submission is captured, routed, and recorded instantly—so no opportunity gets lost in the shuffle.
Keep your team in the loop—automatically.
You don’t need to manually inform sales or support that a new lead has arrived. With real-time Slack or email alerts, the right people are always notified at the right time.
Scale without burning out your team
More leads, more content, more campaigns—but without more chaos. Automation means you can scale your efforts without needing to scale your headcount.
Respond faster, convert better.
Speed matters in marketing. When leads get a welcome email or sales outreach within seconds of submitting a form, your chances of conversion skyrocket.
5. How to Set Up Your First Webflow-Zapier Workflow
Setting up your first Zap might sound intimidating—but trust me, it’s easier than it looks. Let’s walk through a quick example to show just how seamless it can be.
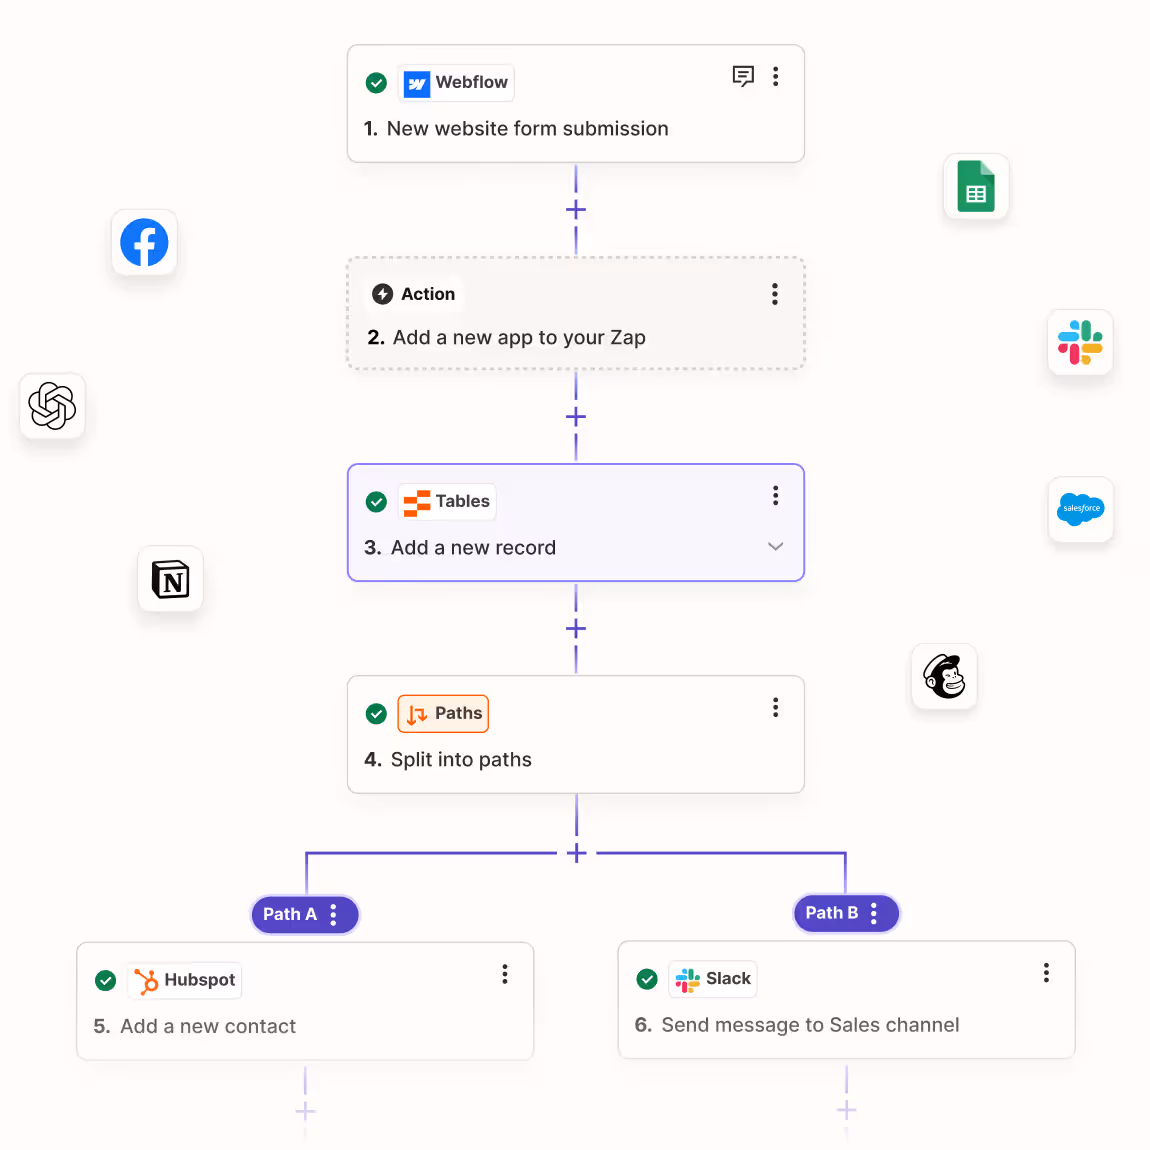
Goal: When someone fills out a form on your Webflow site → add them to Mailchimp → ping your team on Slack → and log their info in Google Sheets.
Here’s how you do it:
Step 1: Sign in to Zapier
Head to Zapier.com and create a free account if you don’t already have one.
Step 2: Create a new Zap
Click "Create Zap" and choose Webflow as your Trigger App.
Set the trigger to “Form Submission” and connect your Webflow account.
Step 3: Choose your Action apps
Now it’s time to stack your automation steps:
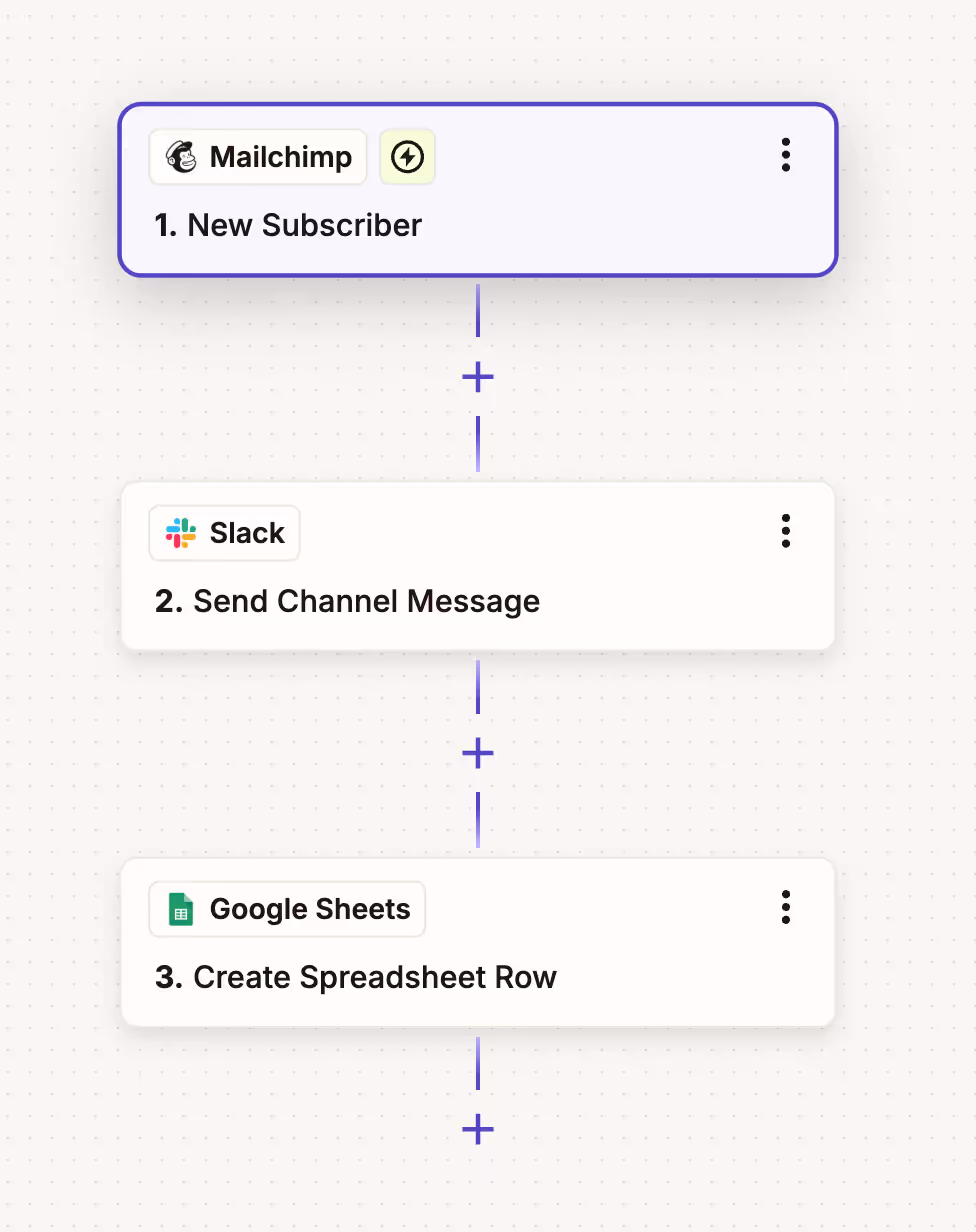
- Step 1 (Mailchimp): Add the new lead to a specific list.
- Step 2 (Slack): Send a message to a chosen channel with lead details.
- Step 3 (Google Sheets): Add a new row with their name, email, and message.
Step 4: Test your Zap
Zapier will guide you through sending test data from Webflow to ensure everything’s working correctly. Run the test and check if:
- The contact appears in Mailchimp
- A Slack message is triggered.
- A row is added to the Google Sheet.
Step 5: Turn it on and let it run
Once everything looks good, hit "Publish Zap"—and you’re done!
From now on, every time a form is submitted, the workflow runs in the background without requiring any action on your part.
6. Best Practices for Webflow + Zapier Automation
Automation is powerful—but only when it's managed well. These best practices will help you keep things running smoothly without overwhelming your workflows.
- Start small, then build:
Begin with one Zap per workflow. Test it, refine it, then expand. Avoid automating everything at once—it’s easier to scale when you start with solid foundations. - Use clear and consistent naming:
Give your Webflow forms, fields, and CRM tags specific names, such as NewsletterSignup_Jan2024, instead of vague ones like Form1. This helps avoid confusion, especially as your Zaps grow. - Avoid overload by limiting concurrent Zaps:
Avoid having multiple Zaps trigger off the same action unless necessary—bundle related actions into a single Zap where possible to avoid conflicts or duplicated data. - Audit your Zaps regularly:
Set a calendar reminder every month to review active Zaps. Ask yourself:
- Are they still relevant?
- Are they performing correctly?
- Are there any throwing errors or sending duplicates?
Regular cleanups prevent chaos and keep your workflows efficient.
- Are they still relevant?
7. Conclusion
Marketing is about moving fast—but not manually.
If you’re still copying form submissions from Webflow into Google Sheets or manually sending welcome emails, you’re spending valuable time on tasks that could be automated in minutes.
Webflow + Zapier lets you automate everything from lead capture and email marketing to analytics and content distribution—no code required.
It doesn’t just save you time.
It helps you move faster, convert quicker, and focus on the big-picture work that really drives growth.
So if you’ve been waiting for a sign to start automating your marketing workflows—this is it.
Let Paddle Creative turn your Webflow site into a marketing machine—automate your first workflow today.

.jpg)
%20(1)%20(1)%20(1).jpg)
.jpg)
%20(1).avif)
.avif)