.svg)
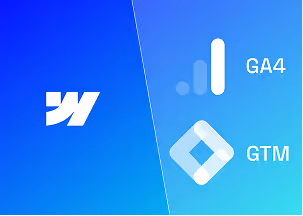
How to Create and Manage A/B Tests in Webflow Using Optibase
A no-code guide to running A/B tests inside Webflow with Optibase
.avif)
How to Create and Manage A/B Tests in Webflow Using Optibase

Introduction
As a Webflow veteran and marketer who has worked with companies across fintech, SaaS, eCommerce, and more, I’ve consistently run into the same challenge: running meaningful A/B tests inside Webflow is a pain.
Despite Webflow’s powerful design capabilities, it lacks native support for experimentation, and traditional testing tools like Google Optimize are either deprecated or code-heavy. Marketers often find themselves caught between wanting fast iteration and needing developer support for every test.
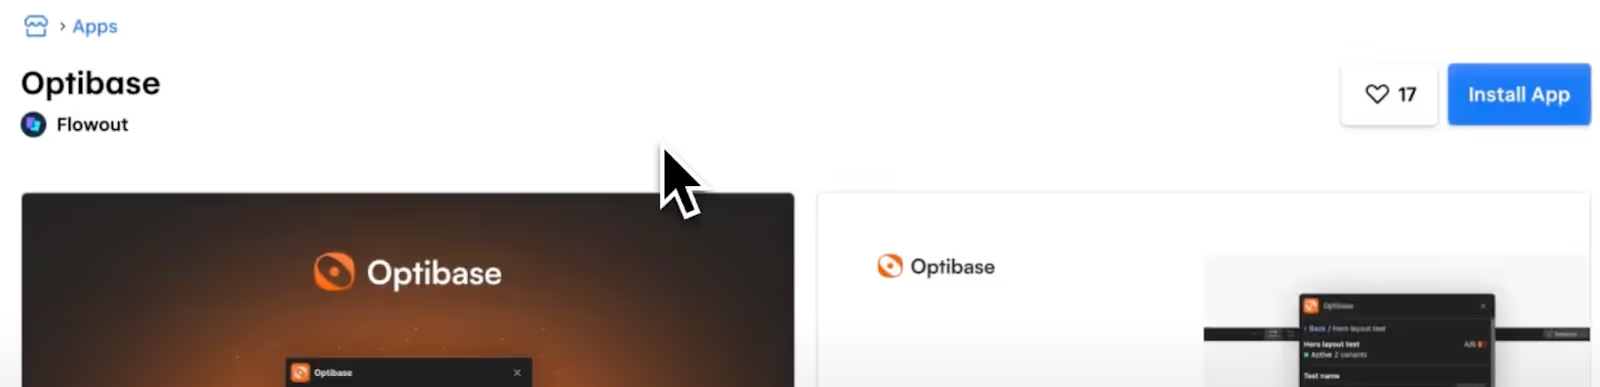
That’s where Optibase comes in.
Optibase is one of the few tools built specifically for no-code A/B testing in Webflow. It allows you to visually create variants, split traffic, and measure conversions, all without touching code or rebuilding designs from scratch. It's a simple, powerful way to bring experimentation into your Webflow workflow.
And the value is real. A study by Invesp found that companies using A/B testing see an average of up to 20–25% higher conversion rates compared to those that don’t. So if you're building pages in Webflow but not testing them, you're leaving money on the table.
What Is Optibase & Why Use It with Webflow?
Optibase is a no-code A/B testing platform tailor-made for Webflow. Instead of wrangling JavaScript or relying on bloated testing suites, Optibase slots neatly into your stack and lets you:
- Create test variants visually, directly on your live site
- Split traffic between the original and test versions
- Define conversion goals (like clicks, scrolls, or form submissions)
- Track performance in real-time
- Publish winning variants back into your Webflow project.
It does all of this by injecting lightweight logic through a single line of code you add to your Webflow site's custom code area. Once installed, Optibase takes over the heavy lifting, handling variant delivery, user assignment, and performance tracking.
Unlike traditional platforms like VWO or Optimizely, which can be overkill for simple marketing sites or landing pages, Optibase is lightweight, fast, and deeply Webflow-native, making it ideal for startups, agencies, and growth teams seeking clarity without complexity.
Step-by-Step – Setting Up Your First A/B Test in Webflow with Optibase
Running your first A/B test in Webflow using Optibase is refreshingly simple, especially compared to traditional testing platforms. Here’s a clear breakdown of the entire process from setup to launch.
Step 1: Install Optibase on Your Webflow Site
Optibase now integrates directly with Webflow via the official App Store, which means you no longer need to add scripts to your site’s code manually.
Here’s how to set it up:

- Open your Optibase dashboard and locate the Webflow App link.
- Click the link to get redirected to the Webflow App Store.
- Click "Install" and follow the on-screen installation steps.
- Once installed, open any project in Webflow Designer.

- Click the “Apps” icon in the left toolbar, and then click “Launch Optibase”.

- You’ll be prompted to connect your Optibase account.
- Go back to the Optibase web app, navigate to User > API Keys, and copy your secret API key.
- Paste the key into the Webflow app when prompted, and then click 'Connect'.
- Go back to the Optibase web app, navigate to User > API Keys, and copy your secret API key.
Once connected, you’ll be able to create, edit, and launch tests directly from within the Webflow Designer interface — no manual script insertion needed.
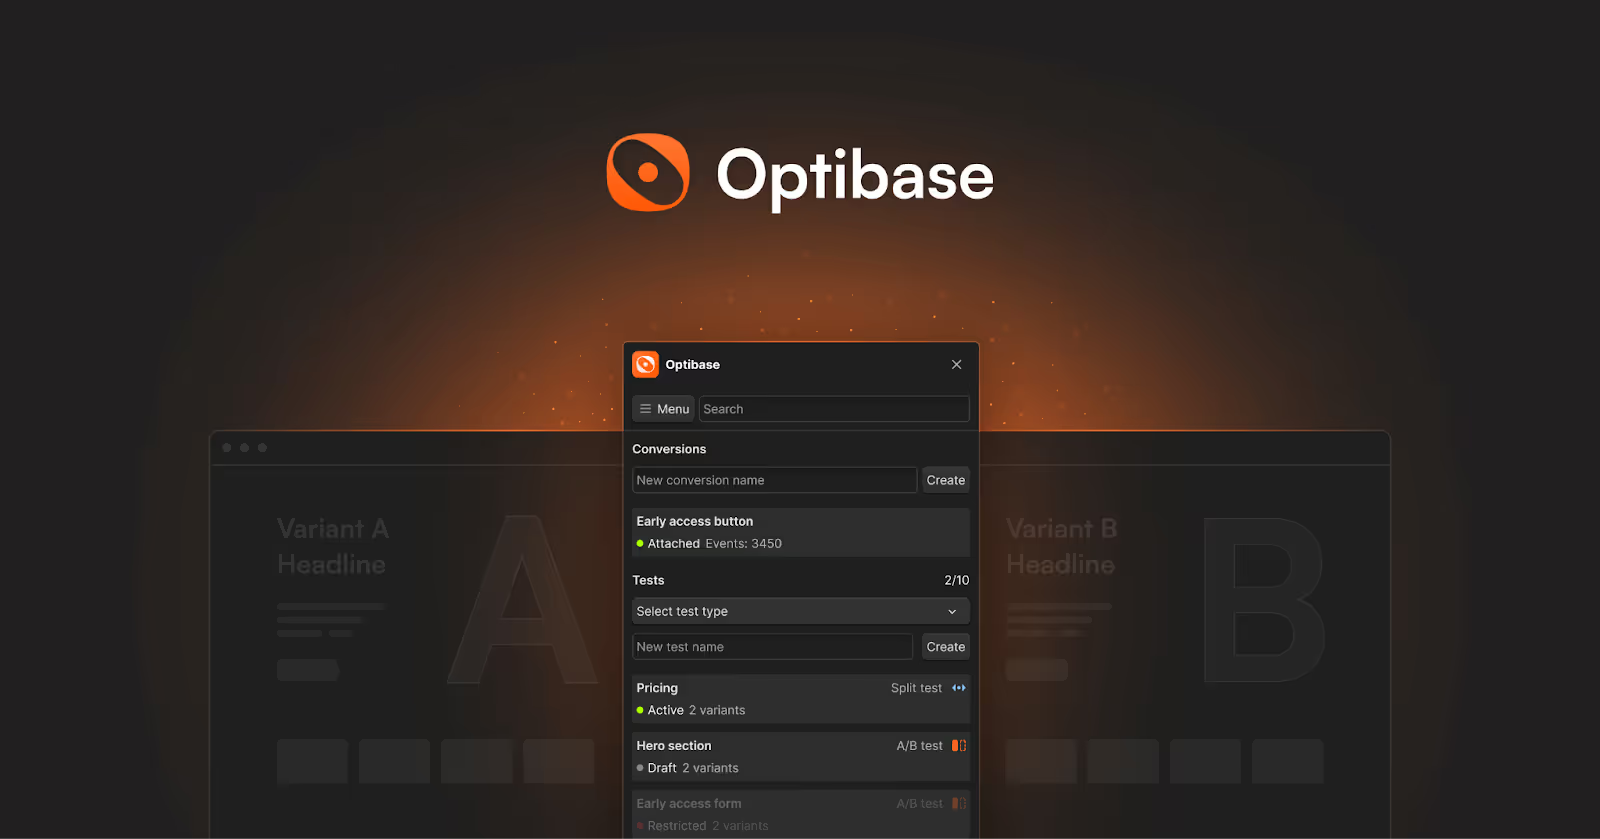
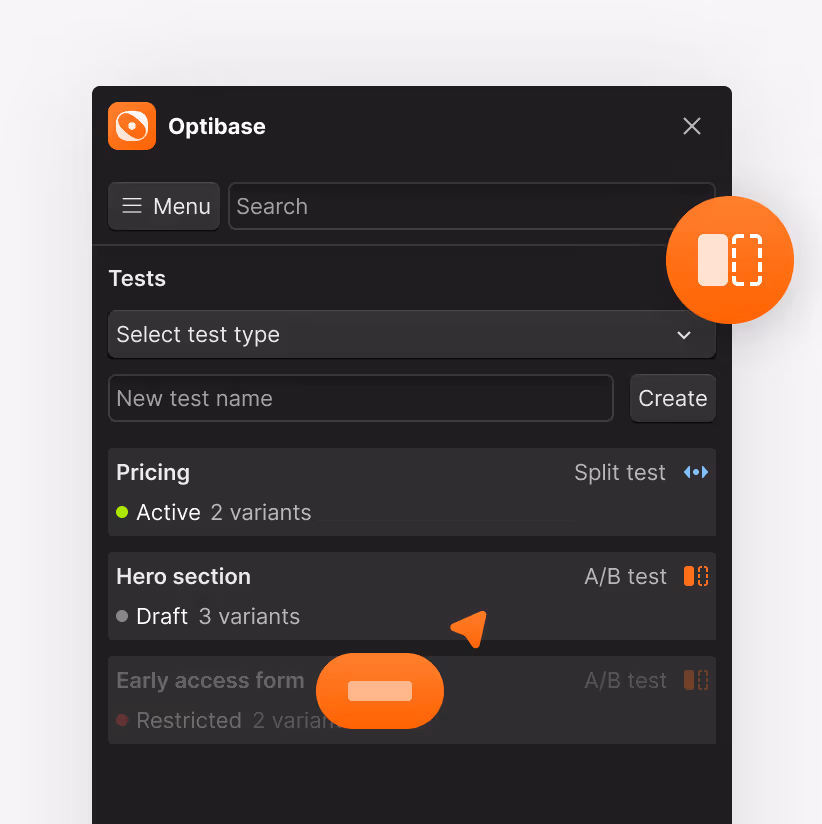
✅ Step 2: Create a New A/B Test in Optibase
Once your Webflow site is connected through the Optibase Webflow App:
- Open the Optibase App inside the Webflow Designer.
- Click “Create A/B Test.”
- Name your test (e.g., “Hero Heading Test”).
- Select the page where your test will run.
- Click “Create Test.”
✅ Step 3: Create and Connect Variants
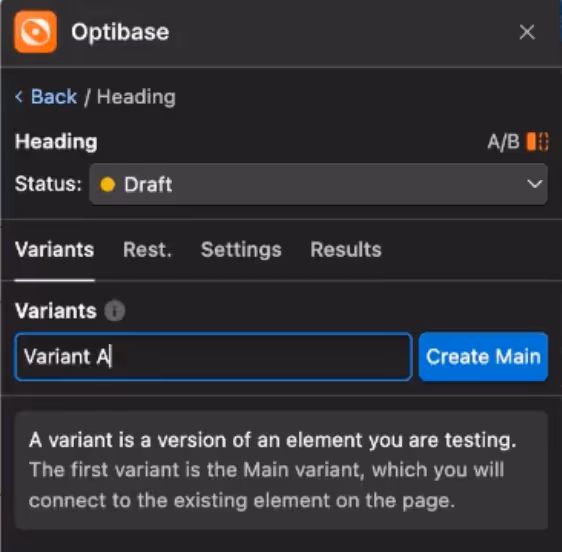
Each variant is a different version of the same element on your site (like a heading, CTA, or image). Here’s how to set them up:
- Inside your test, click “Create Variant.”
Name it Variant A. - Select the element you want to test directly on your Webflow canvas (e.g., the hero heading).

- Click “Connect” to link the element to Variant A.
Now that Variant A is connected:

- Duplicate Variant A by right-clicking on it and selecting “Duplicate.”
- Rename the new variant to Variant B.
- Select Variant B and connect it to the same element.
- Now, toggle between variants A and B using the app to modify content:
- Update the heading, image, or styling as needed for each variant.
- Update the heading, image, or styling as needed for each variant.
Each visitor will only see one version of the element at random, ensuring consistency across sessions.
✅ Step 4: Set Conversion Goal

Before running your A/B test, decide what action you want to track as a conversion. Optibase supports six types of conversion goals:
Conversion Types:
- Click – Tracks clicks on buttons or links.
- Submit – Tracks form submissions.
- Page View – Triggers when a page is loaded.
- Scroll Depth – Fires when a user scrolls to a specific percentage.
- Time on Page – Tracks when users spend a certain amount of time.
- Programmatic – Triggered manually via JavaScript.
Example: Track Email Form Submissions
To track users submitting an email form:
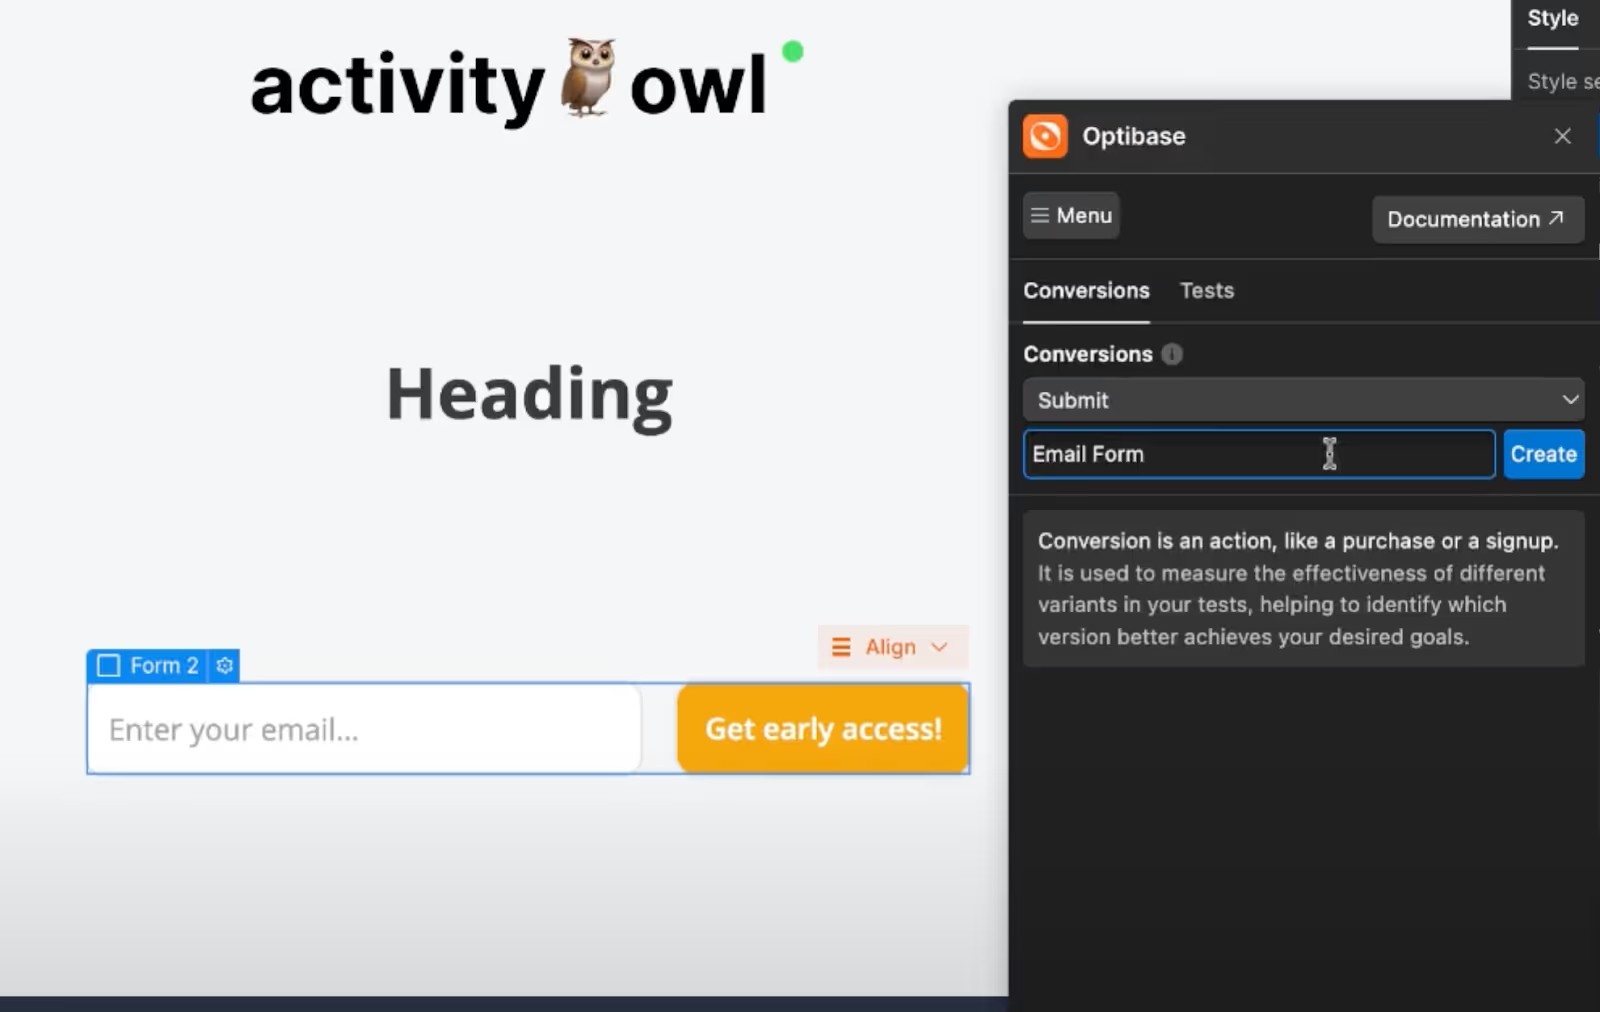
- In the Optibase Webflow app, go to your test and open the Conversions tab.
- Click Create Conversion.
- Choose “Submit” as the conversion type.
- Give it a name, like “Email Form Submit”.
- Click the form element on your page (e.g., newsletter signup).

- Click “Connect Submit Event.”
- A success message will confirm the event has been added.
Test It:
- Publish your Webflow site.
- Visit your live site and submit the form.
- Return to Optibase → Conversions → Events.
- You should now see one conversion event recorded.
To view detailed logs, click 'Conversion Events' to open the full results in the Optibase web app.
✅ Step 5: Publish the Test and Go Live
- Once both variants are set and your conversion goal is configured, click “Go Live.”
- Then, publish your Webflow site to push the changes live.
- Visit the site to confirm the test is active—Optibase will randomly serve either Variant A or B to each new visitor.
- Note: Returning visitors will consistently see the same variant to maintain a smooth user experience.
✅ Step 6: Monitor Results
You can monitor performance in two ways:
- Inside the Webflow Designer’s Optibase app – Shows total users, views, and conversion counts.
- The Optibase Web App offers detailed analytics:
- Filter by date or event type (views, conversions).
- See breakdowns for each variant’s performance.
- Monitor uplift and statistical significance.
- Filter by date or event type (views, conversions).
When you're ready, you can:
- Stop the test
- Launch new variants
- Manually apply winning changes to Webflow.
Tracking Results and Understanding the Data
Once your test is live, Optibase begins collecting data in real-time. Its dashboard presents a clear breakdown of how each variant is performing in relation to your defined conversion goal.
You’ll typically monitor metrics such as:
- Conversion rate – the percentage of users completing the goal on each variant
- Total visitors per variant – to ensure even distribution
- Uplift percentage – the difference in performance between the original and variant
- Statistical significance – an indication of whether the observed difference is likely due to chance
Optibase calculates these metrics automatically and flags when a test reaches statistical significance, helping you avoid acting too early on incomplete data.
Best practice: Let your test run for a statistically valid sample size—either until you hit 95% confidence or a pre-defined timeframe (commonly 2–4 weeks), depending on your traffic levels.
Managing, Updating, or Ending a Test
A good testing framework isn’t just about launching variants—it’s about knowing when to adapt, iterate, or conclude.
Here’s how Optibase supports that process:
- Pause or stop a test: You can stop a running test at any time. Optibase will stop serving the variant and default back to your original Webflow version.
- Create new variants: Based on the results, you can create follow-up variants to test different messaging, layout changes, or even new hypotheses.
- Roll out winning versions: Once a clear winner emerges, you’ll need to update your Webflow site to reflect the change manually. Optibase does not push changes directly into your Webflow Designer, allowing you to maintain full control over how and when changes are deployed.
By cycling through variations and applying what works, you establish a feedback loop that directly improves your site’s performance over time—without relying on guesswork or assumptions.
Best Practices for A/B Testing in Webflow
Running A/B tests is only effective when done with the right discipline. Many teams run tests but draw premature conclusions, test the wrong variables, or lack a clear measurement plan. Here are the key best practices to ensure your experiments with Webflow and Optibase deliver reliable, actionable insights.
1. Test One Variable at a Time
It’s tempting to bundle multiple changes into a single variant, but doing so makes it impossible to know what actually caused the performance change. Start with a single, high-impact element per test, such as a headline, call-to-action, image, or layout.
2. Focus on High-Value Pages
Run tests on pages that drive conversions: homepages, pricing pages, landing pages, and forms. These are the areas where small changes often lead to measurable gains.
3. Define Clear Success Metrics
Before launching a test, set a specific and trackable conversion goal. Whether it’s form submissions, button clicks, or page scroll depth, your goal should reflect real user intent and business value.
4. Run Tests Long Enough
Do not stop a test as soon as one variant appears to be ahead. Wait for statistically significant data based on traffic volume and conversion patterns. In general, allow at least one full business cycle or 2–4 weeks to account for behavioural variation.
5. Don’t Rely on Gut Feelings
Testing should validate hypotheses, not confirm biases. Even experienced marketers get it wrong. A/B testing brings data to creative decision-making, and sometimes the unexpected variant proves to be the winner.
6. Document and Reapply Learnings
Maintain a record of all tests, their hypotheses, outcomes, and final decisions. Over time, this builds a knowledge base of what works for your audience, informing future design, copy, and UX direction.
By following these principles, you’re not just tweaking individual pages—you’re building a systematic approach to conversion rate optimisation inside Webflow, without relying on guesswork or external dev teams.
Use Cases and Real Examples
A/B testing isn’t just a theoretical exercise—it’s how growth-minded teams find real gains. Whether you're working with a SaaS platform, a D2C brand, or a personal portfolio site, here are a few practical examples of how teams are using Optibase with Webflow to make smarter decisions.
Example 1: Testing CTA Copy on a Pricing Page
A B2B SaaS client wanted to increase trial signups. Using Optibase, we tested two versions of the main CTA:
- Variant A: “Start Free Trial”
- Variant B: “Try It Free for 14 Days”
The result? Variant B outperformed by 18%. The clarity in time commitment increased conversions without touching design.
Example 2: Swapping Hero Images on a Landing Page
For an agency running a paid campaign, we tested two hero images: one showing the product in use, the other a clean visual with a headline overlay.
The product-in-use image drove 22% more click-throughs to the signup form. The change took five minutes in Optibase—and saved the team hours in designer/developer time.
Example 3: Reordering Testimonials on a Homepage
We tested whether leading with a well-known client’s testimonial vs a generic quote made a difference.
It did. The variant with the recognisable client increased average time on page and scroll depth significantly.
These are the kinds of insights you simply don’t get without testing, and they make a measurable difference to conversion and revenue over time.
Conclusion
Webflow empowers designers and marketers to build beautiful, high-performing websites—but until recently, testing those sites required workarounds, developer involvement, or third-party tools not built for Webflow’s workflow.
Optibase changes that.
With a simple app, a visual editor, and conversion tracking baked in, you can now run focused, reliable A/B tests entirely within your Webflow site—without adding overhead or complexity.
The best teams don’t guess what works—they test, learn, and improve fast. With Optibase and Webflow, that cycle is finally within reach for no-code teams, solo founders, and scaling startups.
If you’re building in Webflow and haven't started testing yet, this is the perfect moment to do so. The opportunity isn’t just in better design—it’s in smarter decisions. Connect with Paddle Creative to improve your conversions now!

.avif)
%20(1)%20(1)%20(1).avif)
.avif)
%20(1).avif)
.avif)