.svg)
How to Track Marketing Conversions on Webflow
A complete guide to tracking conversions on your Webflow site

TL;DR
- Most Webflow sites collect form submissions but can't attribute where leads came from. Without GA4 event tracking and UTM parameters, ROI reporting is guesswork
- The most reliable conversion tracking setup in 2026 combines Webflow's native data with Google Analytics 4 (GA4) and Google Tag Manager (GTM) for granular event attribution
- Beyond form submissions, effective tracking covers CTA clicks, e-commerce funnels, scroll depth, and outbound links, each revealing where users drop off before converting
- Behavioural tools like Hotjar and Microsoft Clarity add a visual layer on top of analytics data, showing what users do, and why
- Conversion tracking is only valuable if you act on it. The goal is a transparent marketing engine where every click is attributed and every campaign decision is backed by data
Introduction
Wondering how to track marketing conversions on your Webflow website? The most reliable approach in 2026 is to combine Google Analytics 4 (GA4), Google Tag Manager (GTM), and Webflow's built-in form tracking. This hybrid setup lets you monitor form submissions, e-commerce purchases, CTA clicks, and campaign attribution in one dashboard, keeping your marketing data accurate and actionable.
Quick Answer: How do you track marketing conversions on Webflow?
The most reliable approach is to combine Google Analytics 4 (GA4), Google Tag Manager (GTM), and Webflow's built-in form tracking. It tracks form submissions, e-commerce purchases, CTA clicks, and campaign attribution in one place, giving you accurate data across every channel.
Quick Steps: How to set up conversion tracking on Webflow in 5 steps
- Define your conversion goals: identify the specific actions that matter for your business, whether that's form submissions, purchases, CTA clicks, or downloads
- Connect GA4 and GTM to Webflow: paste your GA4 Measurement ID into Webflow's integrations tab and add the GTM script to your custom code section
- Set up event tracking: configure triggers and tags in GTM to capture form submissions, button clicks, scroll depth, and e-commerce events
- Add campaign attribution: use UTM parameters on all paid and email campaigns so GA4 can attribute conversions to the correct source
- Analyse and act: use GA4's conversion reports, funnel analysis, and heatmap tools to identify drop-off points and optimise accordingly
1. What Are Marketing Conversions on a Website?
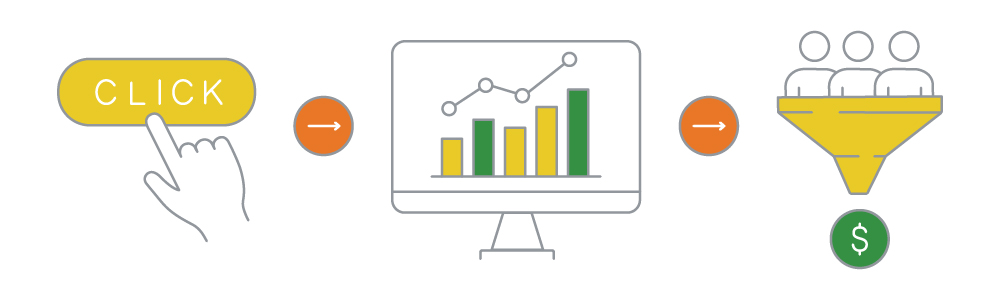
A marketing conversion occurs when a visitor completes a desired action on your website. These actions align with your business goals and can range from simple engagements to revenue-generating events.
Types of Conversions:
- Macro Conversions (Primary Business Goals)
- Making a purchase
- Subscribing to a service
- Booking a demo or appointment
- Micro Conversions (Engagement and Lead Indicators)
- Clicking on a CTA button
- Submitting a contact form
- Downloading a whitepaper or resource
- Watching a product video
Why Tracking Conversions Matters
Tracking conversions helps you:
- Identify which marketing channels drive the most valuable traffic.
- Optimise ad spend by understanding customer journeys.
- Improve website UX by spotting friction points in the conversion funnel.
- Make data-driven decisions to increase ROI.
Stop Guessing. Start Scaling with Pro Tracking
Don't let bad data ruin your ROI. Let a Webflow Premium Partner audit your tracking setup today.
2. How Do You Set Up Conversion Tracking in Webflow?
2.1 Identifying Key Conversion Actions
Before implementing tracking tools, define which user actions are important for your business. Ask yourself:
- What action do I want my visitors to take?
- How do I measure the success of my campaigns?
- Which pages or touchpoints contribute to conversions?
Common Webflow conversion goals include:
- Lead generation: Contact form submissions, email sign-ups.
- E-commerce transactions: Purchases, add-to-cart actions, checkout completions.
- Engagement tracking: CTA clicks, downloads, video views.
2.2 Setting Up Goal Tracking in Google Analytics (GA4)
Google Analytics 4 (GA4) is one of the most popular tools for tracking conversions on Webflow. Here’s how to set it up:
Step 1: Connect Google Analytics to Webflow
- Go to your Webflow project settings.
- Navigate to the Integrations tab.
- Paste your GA4 Measurement ID into the Google Analytics section.
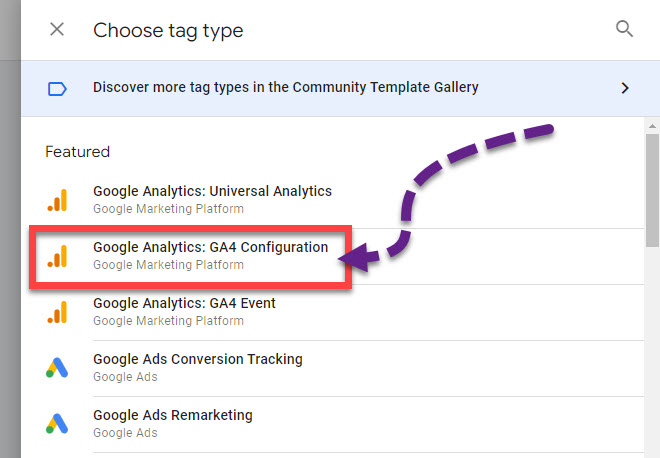
Step 2: Enable Event Tracking in GA4
Google Analytics 4 tracks events automatically, but you can also create custom events:
- Go to Admin, then Events.
- Click Create Event to define specific conversion actions.
- Label the event (e.g., form_submission, button_click).
Step 3: Mark Events as Conversions
- In GA4, go to Admin, then Conversions.
- Click New Conversion Event and enter the event name you created.
- Save and track conversions under the Conversions report.
2.3 Using Google Tag Manager (GTM) for Advanced Tracking
For more control over event tracking, use Google Tag Manager (GTM):
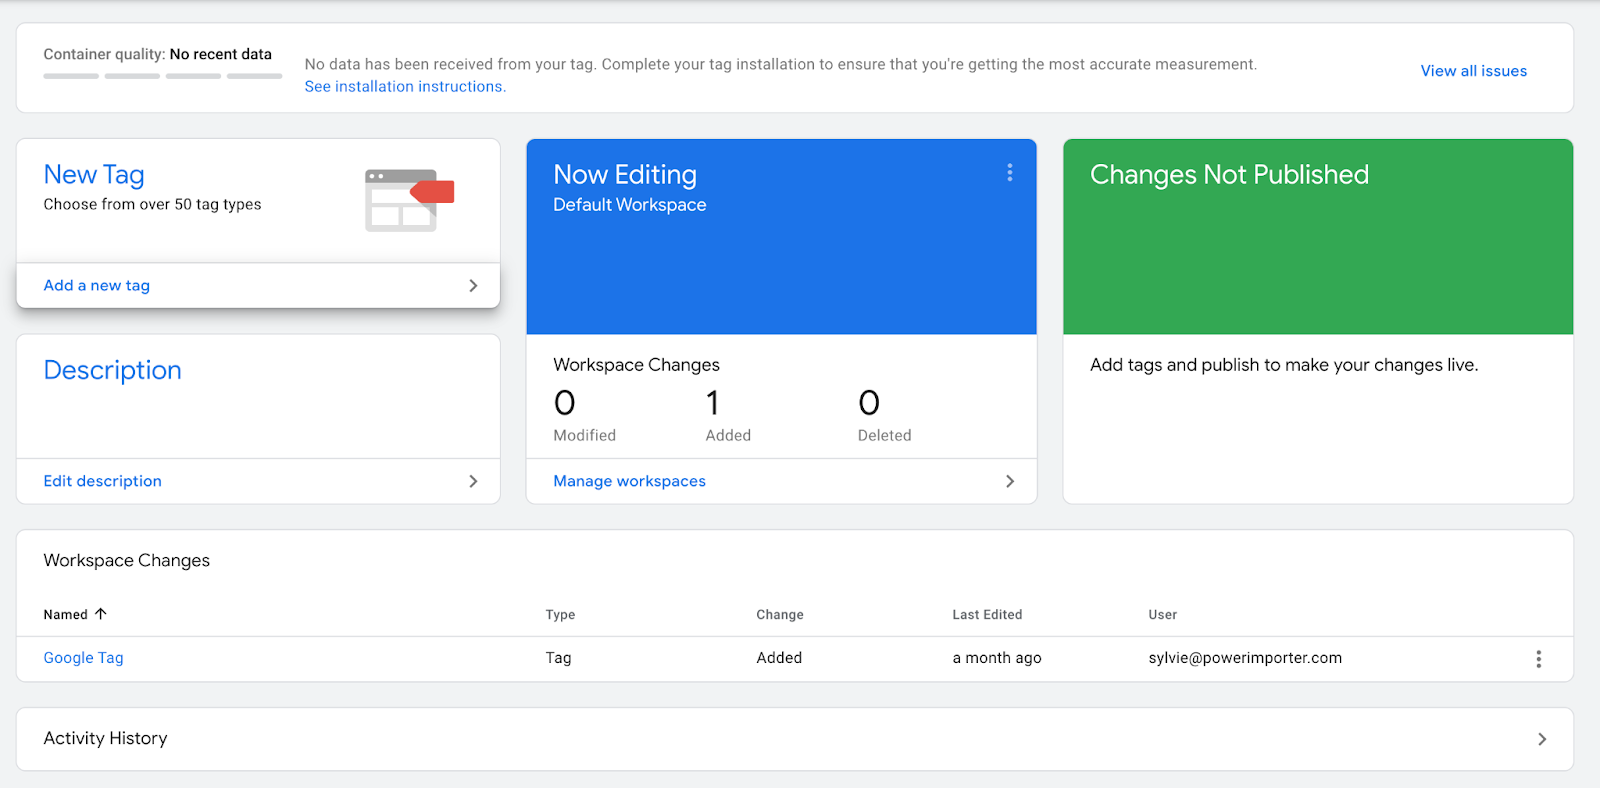
- Sign up for Google Tag Manager and create a container for your Webflow site.
- Add the GTM script to Webflow in the Custom Code section.
- Set up triggers and tags in GTM to track form submissions, button clicks, and scroll depth.
- Link GTM to Google Analytics, Google Ads, and Facebook Pixel for advanced tracking.
Read our complete guide on adding GTM to Webflow.
Popular Tools for Conversion Tracking on Webflow
- Google Analytics 4 (GA4): Comprehensive website tracking and event monitoring.
- Google Tag Manager (GTM): Flexible tag management for tracking various events.
- Facebook (Meta) Pixel: Tracks conversions and remarketing for Facebook & Instagram ads.
- LinkedIn Insight Tag: B2B conversion tracking for LinkedIn Ads.
- Hotjar / Microsoft Clarity: Heatmaps and session recordings to analyse user behaviour. Read the difference between Hotjar & Clarity here.
- HubSpot / Zapier: CRM and lead tracking automation.
3. Using Webflow’s Built-in Form Submission Tracking
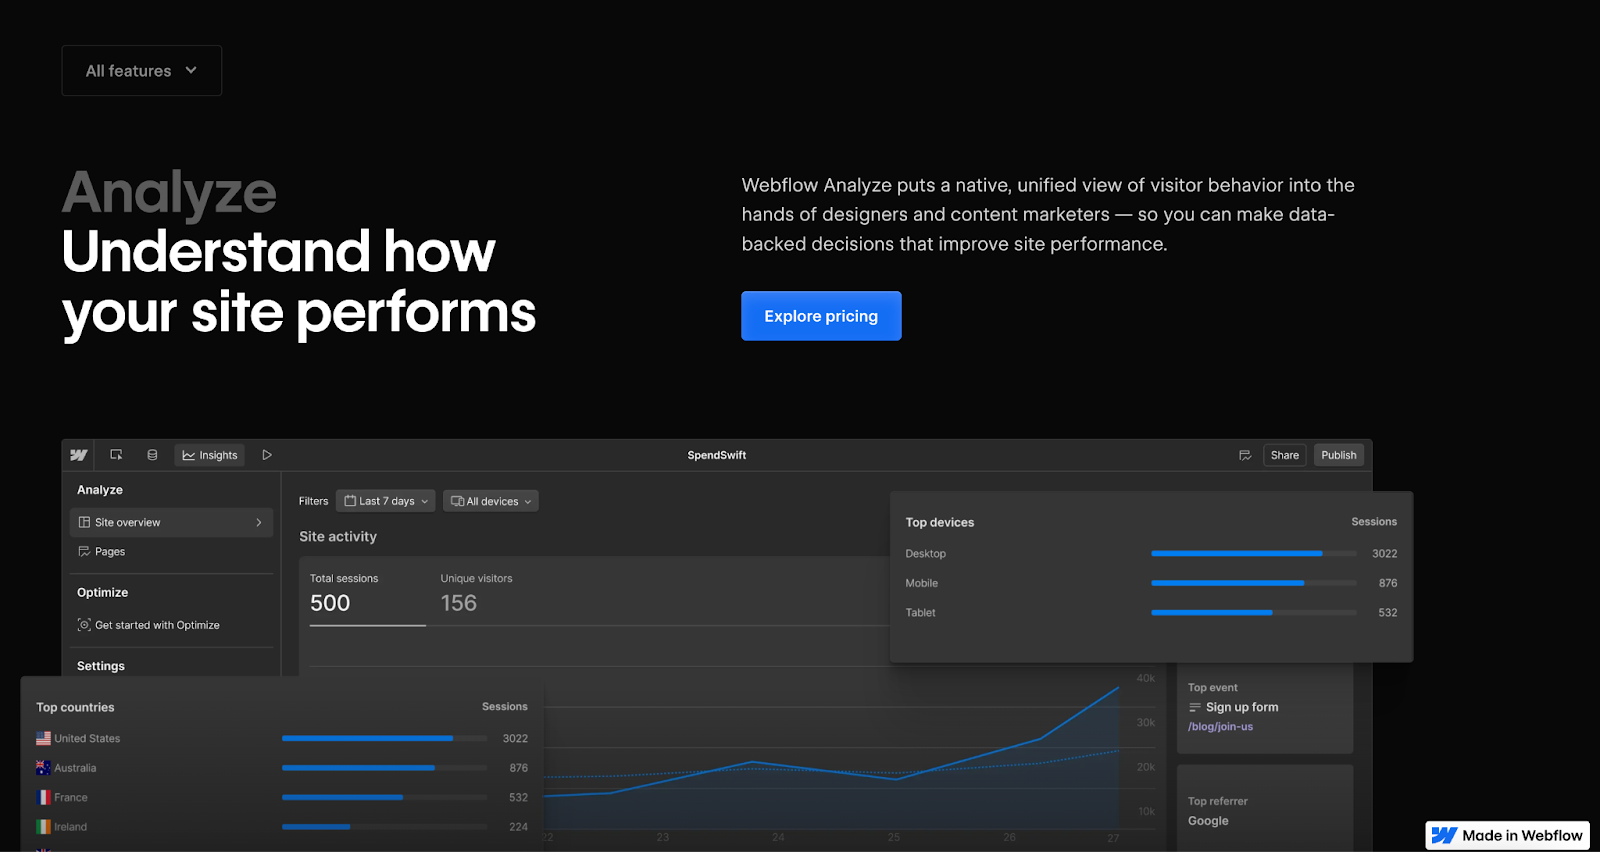
Tracking form submissions is one of the most critical parts of conversion tracking. It measures how well your lead generation works. Webflow provides a built-in form submission tracking system using Webflow Analyze, but for deeper insights and attribution, integrating third-party analytics tools like Google Analytics 4 (GA4), Google Tag Manager (GTM), or CRM software is recommended.
3.1 Webflow’s Built-in Form Tracking
Webflow captures and stores form submissions natively within its dashboard. Here’s how to access them:
- Webflow Project Dashboard
- Navigate to Project Settings, then Forms.
- View all form submissions, including timestamps and IP addresses.
- Download data as a CSV file for offline analysis.
- Email Notifications
- Webflow can send real-time email alerts for every form submission.
- These notifications are useful for manual tracking but lack advanced analytics, such as user behaviour before submission.
Paddle Creative Insight: We frequently see Webflow sites collecting form submissions but failing to attribute where the leads came from. Without GA4 event tracking and UTM parameters, marketing teams cannot connect leads to specific campaigns, making ROI reporting almost impossible.
3.2 Limitations of Webflow’s Native Form Tracking
While Webflow’s built-in form tracking is helpful, it has some limitations:
- No Source Tracking: It doesn’t show where users came from (organic search, paid ads, social media, etc.).
- No Conversion Attribution: It doesn’t integrate with attribution models in analytics tools.
- No User Behaviour Insights: It lacks heatmaps, drop-off tracking, and A/B testing.
To overcome these limitations, Google Analytics 4 or Google Tag Manager is necessary. Webflow Analyze is a relatively new tool compared to the more established and mature Google Analytics.
3.3 Tracking Webflow Form Submissions in Google Analytics 4 (GA4)
Since Webflow doesn’t natively integrate with GA4, you need to track form submissions as conversion events manually.
Step 1: Add Google Analytics to Webflow
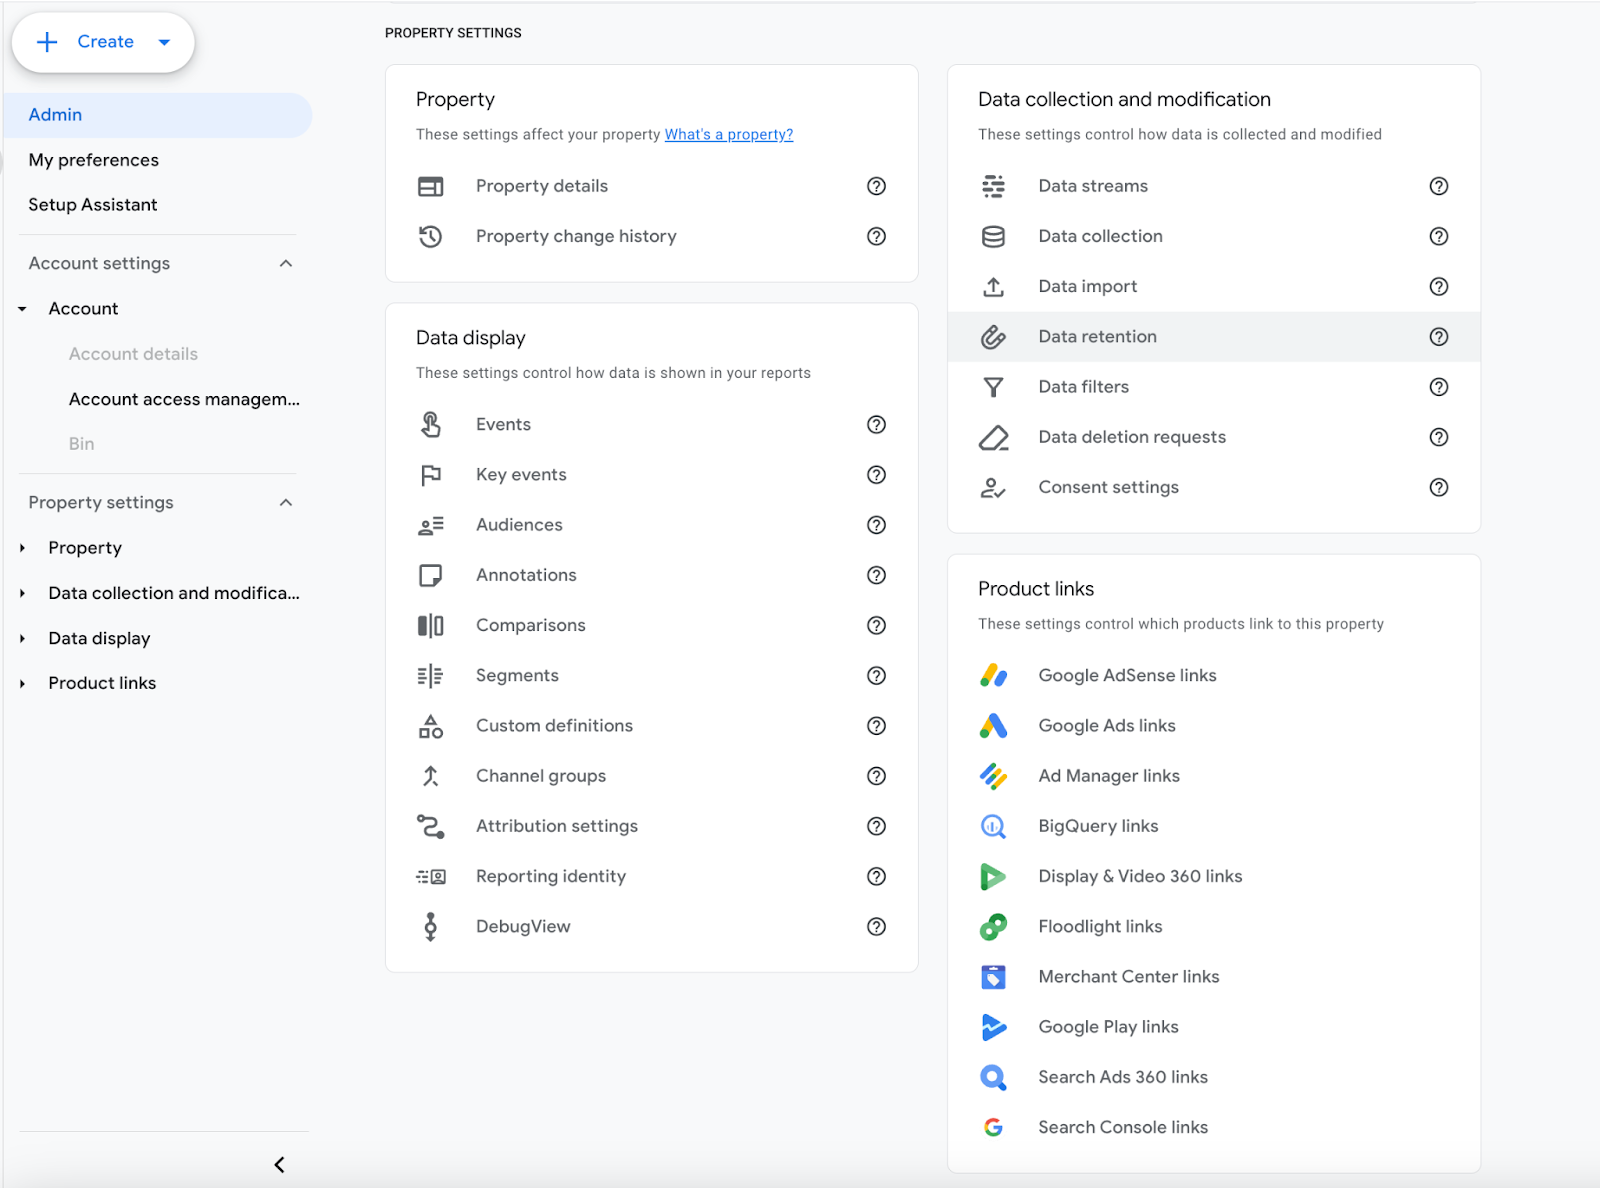
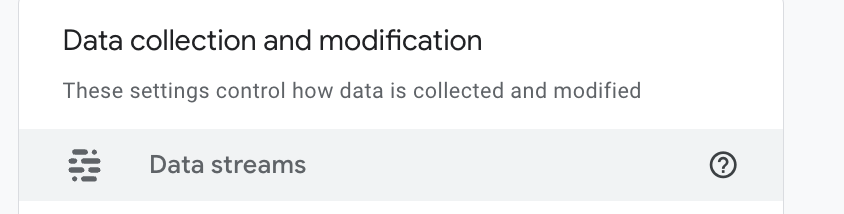
- Go to Google Analytics Admin, then Data Streams, then Add Stream.

- Copy the GA4 Measurement ID.
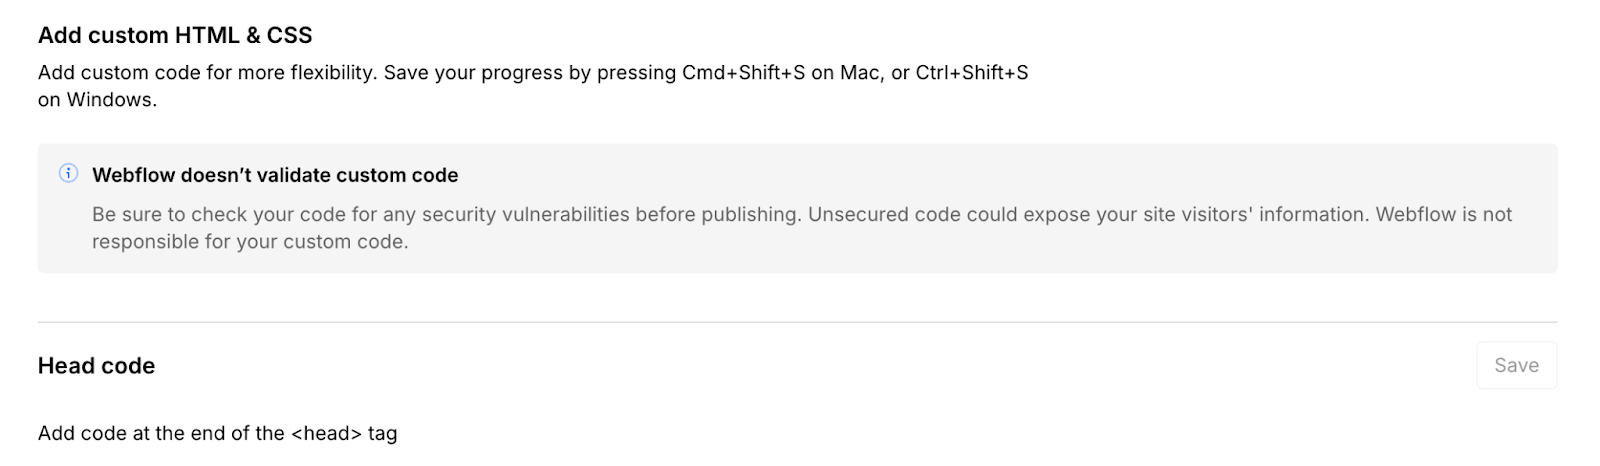
- In Webflow, go to Project Settings, then Custom Code, then Paste GA4 ID in the <head> section.
- Publish your Webflow site.
Step 2: Set Up Event Tracking for Form Submissions
- Open Google Tag Manager (GTM) and create a New Tag.
- Select Google Analytics: GA4 Event as the tag type.
- Set the Event Name to form_submission.
- Configure the trigger:
- Choose Form Submission Trigger
- Select "All Forms" (or specify a form class/ID if tracking specific forms).
- Save the tag and publish changes in GTM.
Step 3: Mark the Event as a Conversion in GA4
- Go to GA4, then Configure, then Conversions.
- Click New Conversion Event and enter form_submission.
- Save the conversion and start tracking leads from different sources.
By setting this up, you can track which marketing channels drive the most leads, helping optimise your advertising and SEO efforts.
3.4 Syncing Webflow Forms with CRM Tools
For better conversion tracking and lead management, you can automatically sync Webflow form submissions with third-party tools like:
1. HubSpot CRM
- Connect Webflow with HubSpot Forms to store and analyse leads effectively.
- Set up email workflows and automated follow-ups based on form submissions to streamline your processes.
2. Zapier for Automation
- Automate form submissions to Google Sheets, Slack, Notion, or Trello.
- Trigger email alerts, lead scoring, and CRM updates automatically.
3. Mailchimp for Email Marketing
- Automatically add form submissions to your Mailchimp email list.
- Set up automated welcome emails or nurturing sequences to streamline your customer interactions.
Read our guide on Integrating Airtable with Webflow.
4. How Do You Track Webflow E-Commerce Conversions?
For Webflow-based e-commerce stores, tracking purchases, add-to-cart events, and checkout drop-offs is essential for optimising conversion rates and marketing spend.
4.1 Enabling Google Analytics 4 (GA4) E-Commerce Tracking
Step 1: Enable Enhanced E-Commerce in GA4
- Log in to Google Analytics and navigate to the Admin section.
- Under Data Streams, select your website.
- Enable Enhanced E-Commerce.
Step 2: Set Up E-Commerce Events in Webflow
In Webflow, e-commerce events are not automatically tracked in Google Analytics 4 (GA4). You need Google Tag Manager (GTM) to send purchase data.
- Open Google Tag Manager (GTM).
- Create a new GA4 Event Tag for e-commerce tracking.
- Set up the following event triggers:
- view_item: when a user views a product.
- add_to_cart: when an item is added to the cart.
- begin_checkout: when checkout is initiated.
- Purchase: when a user completes the order.
- Save and publish the GTM container.
4.2 Tracking Checkout Abandonment Rates
A high cart abandonment rate signals checkout friction. To track it:
- Use GA4’s Funnel Report to visualise the checkout process.
- Set up an event for 'begin_checkout' but not 'purchase', identifying drop-off points.
- Use retargeting ads (such as Google Ads and Facebook Ads) to encourage users to return and complete purchases.
4.3 Comparing Webflow’s Built-in Analytics vs. Google Analytics 4 (GA4)
For advanced conversion tracking, Google Analytics 4 is essential alongside Webflow’s built-in analytics.
5. Integrating Third-Party Conversion Tracking Tools
5.1 Facebook (Meta) Pixel for Ad Conversion Tracking
If you run Facebook or Instagram ads, the Meta Pixel helps track conversions and retarget visitors.
How to Install Meta Pixel on Webflow:
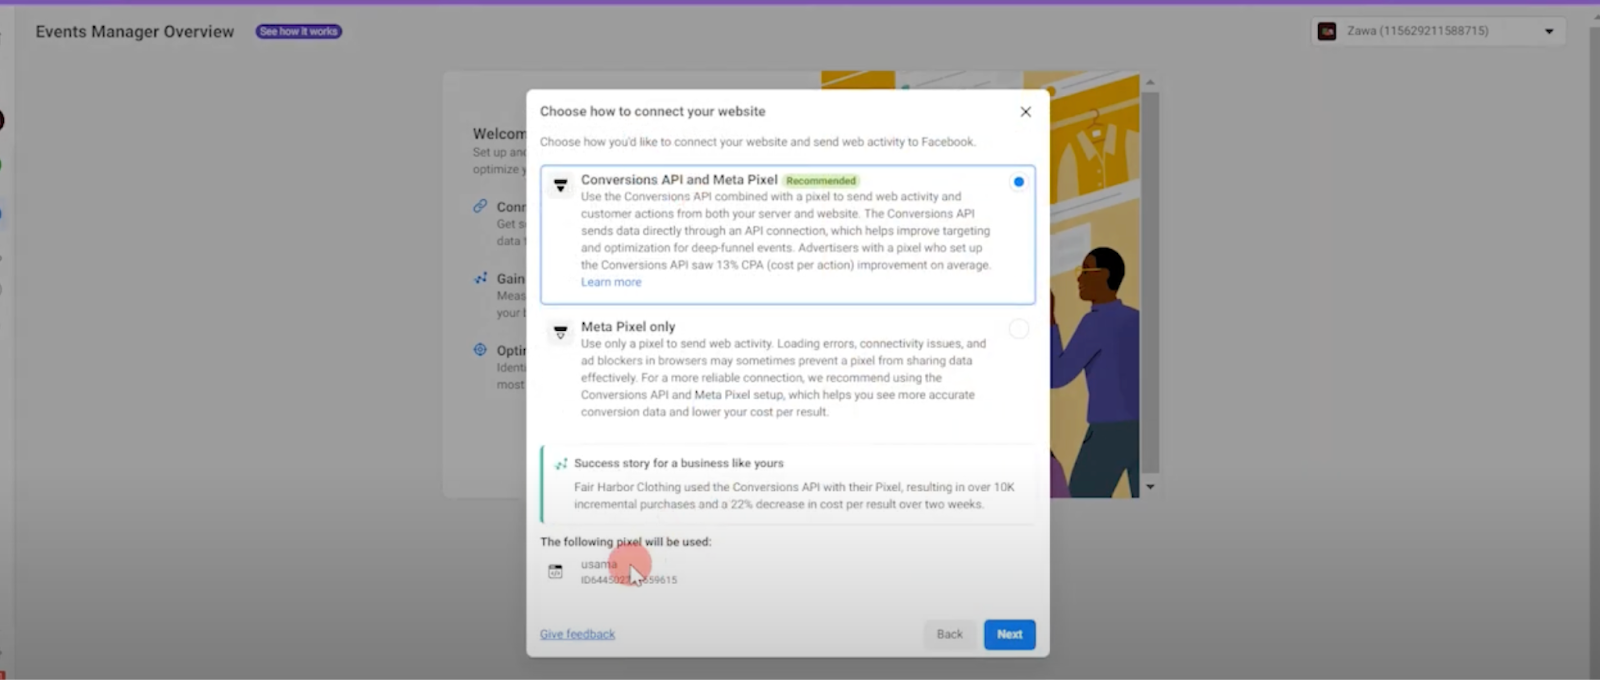
- Go to Facebook Events Manager and create a Meta Pixel.
- Copy the Pixel ID.
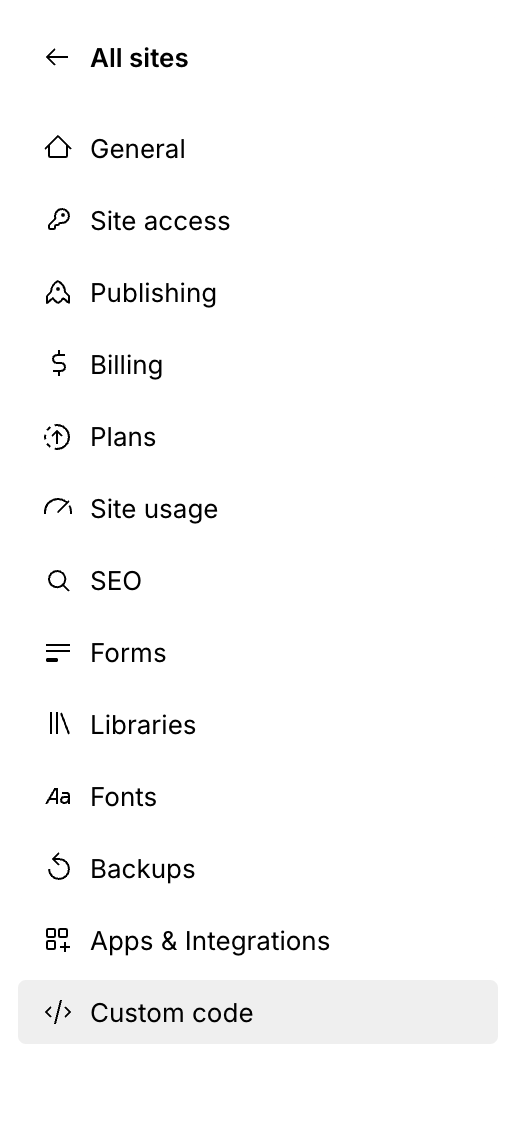
- Paste the Pixel code into Webflow Project Settings> Custom Code> Head Section.
- Publish your Webflow site.
Tracking Facebook Conversions
To track conversions like lead forms, purchases, or page views:
- Set up Facebook Event Tracking inside Events Manager.
- Track key actions:
- Lead: form submissions.
- Purchase: e-commerce transactions.
- ViewContent: product page visits.
- Run Facebook Retargeting Ads to bring back potential buyers.
5.2 Google Ads Conversion Tracking
For tracking Google Ads conversions:
- Go to Google Ads, then Conversions.
- Create a new conversion action (e.g., lead form, purchase).
- Copy the Google Ads tracking code.
- Paste the script into Webflow’s Custom Code section.
- Verify the setup using Google Tag Assistant.
The setup above gives you accurate ROI tracking for your paid ad campaigns.
6. Tracking User Behaviour to Optimise Conversions
Tracking conversions is just one part of the equation. Understanding why users convert (or don’t) is equally important. By analysing user behaviour, you can identify bottlenecks in the customer journey and optimise your Webflow site for improved conversions.
6.1 Using Heatmaps and Session Recording
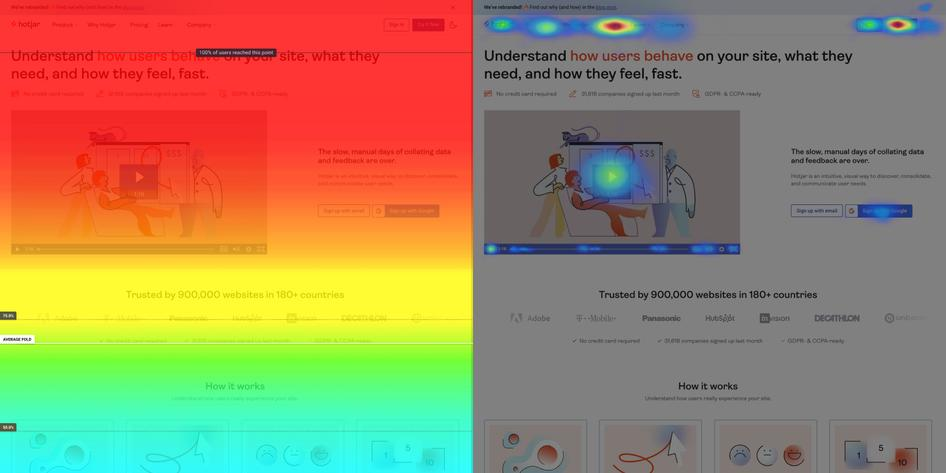
What Are Heatmaps and Why Are They Useful?
A heatmap is a visual representation of user interactions on your website, showing where visitors click, scroll, or hover the most. Heatmaps help you:
- Identify high-engagement areas on your site.
- Spot friction points in the conversion funnel.
- Optimise CTA placements for better conversions.
Best Heatmap Tools for Webflow
- Hotjar: Heatmaps, session recordings, and surveys.
- Microsoft Clarity: Free heatmap and user session tracking.
- Crazy Egg: AI-powered heatmap analysis and A/B testing.
How to Set Up a Heatmap on Webflow with Hotjar
- Sign up for Hotjar and create a free account.
- Go to Hotjar Dashboard, then Add a New Site.
- Copy the tracking code provided by Hotjar.
- In Webflow, navigate to Project Settings, then Custom Code.
- Paste the Hotjar tracking code in the <head> section and save changes.
- Publish your Webflow site and start collecting heatmap data.
Using Session Recordings for Deeper Insights
Session recordings track real user interactions in real-time, helping you:
- See where users hesitate or struggle.
- Identify distractions that cause drop-offs.
- Optimise mobile and desktop experiences separately.
6.2 A/B Testing Landing Pages
What is A/B Testing?
A/B testing (also known as split testing) involves comparing two versions of a webpage to determine which performs better. By implementing A/B testing it can help optimise conversions by testing different headlines, CTA placements, or page layouts. Read how to create high-converting landing pages in Webflow.

Best A/B Testing Tools for Webflow
- Webflow Optimize: The official Webflow optimisation tool
- Optibase: A Webflow specific A/B testing tool
- VWO (Visual Website Optimiser): Paid tool for A/B testing
- Convert.com: Enterprise-level split testing for Webflow
How to Run an A/B Test on Webflow Using Google Optimize
- Create an Optibase account.
- Select the type of A/B test (e.g., CTA button text, pricing page layout).
- Generate the snippet and paste it into Webflow’s Custom Code section.
- Define the conversion goal (e.g., form submission, button click).
- Run the test for at least 1-2 weeks to gather meaningful data.
Examples of A/B Tests for Webflow Sites
- CTA Button Test: "Sign Up Now" vs. "Get Started Today"
- Headline Test: "Boost Your SEO with Webflow" vs. "Rank #1 with Webflow"
- Pricing Page Layout: Single pricing tier vs. Multi-tier pricing plans
- Landing Page Design: Image-heavy vs. Minimalist
How to Measure A/B Test Success
- Track conversion rates for each variation using Google Analytics.
- Identify the winning version based on engagement and conversions.
- Apply the best-performing changes permanently to your Webflow site.
6.3 Event Tracking with Custom JavaScript
Why Use Custom Event Tracking?
Webflow does not have built-in event tracking, so JavaScript is necessary for advanced tracking, like:
- Button clicks (e.g., tracking CTA effectiveness).
- Video engagement (e.g., tracking how long users watch).
- Scroll depth tracking (e.g., measuring content consumption).
- Outbound link clicks (e.g., tracking external referrals).
How to Track Button Clicks Using Google Tag Manager (GTM)
- Open Google Tag Manager and create a New Tag.
- Select Google Analytics 4 Event Tag.
- Set the event name to "cta_button_click".
- Add a Click Trigger:
- Choose Click - All Elements.
- Set the trigger to fire only on CTA button clicks.
- Save and publish the tag.
How to Track Scroll Depth Using JavaScript
Scroll tracking helps measure how much of your content users actually consume. Here’s a JavaScript snippet to track scroll depth:
Where to add this code?
- Go to Webflow Project Settings, then Custom Code, then Footer Section
- Paste the script and publish your site.
How to Track Outbound Link Clicks in Google Analytics
To track when users click external links leading away from your site:
Add the class of the button or link you want to track after ‘a’ in line one.
For example, if the button’s class is ‘track-outbound’, line one becomes: document.querySelectorAll('a.track-outbound').forEach(anchor => {
Benefits of Custom JavaScript Tracking:
- Provides granular insights beyond default analytics.
- Helps track user engagement without slowing down Webflow.
- Works with Google Analytics 4 (GA4) & Google Tag Manager (GTM).
7. How Do You Analyse Webflow Conversion Data?
Tracking conversions is only valuable if you can analyse and interpret the data to make informed decisions. This section covers how to extract insights from Google Analytics, Webflow's built-in reports, and campaign tracking tools.
Paddle Creative Insight: One of the most common tracking mistakes we see is "duplicate event firing" where both a hard-coded GA4 script and a GTM tag fire the same event. This inflates your conversion data by 100% and leads to highly misleading performance metrics.
7.1 Using GA4 Reports for Conversion Analysis
Google Analytics 4 (GA4) provides advanced reporting features to analyse how users interact with your Webflow site and what drives conversions.
Key GA4 Reports to Track Marketing Conversions
1️. Engagement, then Events Report
- View all conversion-related events (form_submission, purchase, add_to_cart).
- Identify which events drive the most value.
2️. Engagement, then Conversions Report
- Shows how many times a specific conversion event occurred.
- Helps measure lead generation, checkout completions, or downloads.
3️. Traffic Acquisition Report
- Identifies the marketing channels that bring the most conversions.
- Compare the performance of organic search, social media, email, and paid ads.
4️. User Behaviour Flow
- Shows how visitors navigate through your site before converting.
- Helps pinpoint drop-off points in the conversion funnel.
How to Set Up Custom GA4 Reports for Conversions
- Go to GA4, then Explore, then Create a New Report
- Select "Free Form" to build a custom report.
- Choose metrics (conversions, session duration, bounce rate).
- Filter data by source/medium (e.g., Organic Search vs. Facebook Ads).
- Save the report for ongoing analysis.
Interpreting GA4 Data for Optimisation
- High drop-off rate in checkout? Improve checkout UX & reduce friction.
- More conversions from mobile? Go mobile-first & speed up load times.
- Low conversion rate from Facebook Ads? Test new ad creatives & landing pages.
7.2 Identifying Low-Performing Pages
Not all pages contribute equally to conversions. Some may attract visitors but fail to drive action. Identifying low-performing pages helps improve bounce rate, session duration, and engagement.
How to Find Low-Performing Pages in Google Analytics
1️. Behaviour, then Landing Pages Report (GA4)
- See which pages drive the most conversions.
- Find pages with high traffic but low conversions (potential issues).
2. Exit Pages Report (GA4)
- Shows where users drop off before converting.
- Resolve friction points in forms, CTAs, or checkout processes.
Common Issues & Fixes for Low-Performing Page
Paddle Creative Insight: Use heatmaps (Hotjar, Microsoft Clarity) to see where users lose interest.
7.3 Setting Up UTM Tracking for Campaigns
When running Facebook Ads, Google Ads, or email campaigns, it's important to track which sources drive the most conversions. UTM parameters enable you to track campaign performance within Google Analytics.
What Are UTM Parameters?
UTM (Urchin Tracking Module) parameters are tags added to URLs to track the sources of traffic.
🔹 Example:
https://yourwebflowsite.com/landing-page?utm_source=facebook&utm_medium=cpc&utm_campaign=spring_sale
How to Generate UTM Links for Campaigns
- Use Google’s Campaign URL Builder, the UTM Builder
- Enter your website URL, source, medium, and campaign name.
- Copy the generated UTM link and use it in ads, emails, and social posts.
- Track the performance in Google Analytics under Acquisition, then Traffic Source.
Best Practices for UTM Tracking:
- Keep UTM names consistent across all campaigns.
- Avoid long, complex UTMs (keep them short & readable).
- Use Bit.ly or Rebrandly to shorten UTM links in social media.
8. Best Practices for Accurate Conversion Tracking
Accurate conversion tracking needs proper setup, testing, and ongoing monitoring. Here are the best practices.
8.1 Placing Tracking Scripts Correctly
Common Mistakes in Webflow Tracking Setup:
- Missing GA4 or GTM scripts in the Webflow Custom Code section.
- Placing tracking codes in the wrong section (Head vs. Body).
- Blocking analytics tracking due to cookie consent settings.
Where to Place Tracking Codes in Webflow?
- Google Tag Manager (GTM)
- Go to Webflow, then Project Settings, then Custom Code.
- Paste the GTM script inside the <head> section.
- Publish the site and verify the setup using Google Tag Assistant.
- Meta Pixel, LinkedIn Insight Tag, Google Ads
- Add scripts in the Footer section to avoid slowing page load times.
Paddle Creative Insight: Always test tracking scripts using Google Tag Assistant or Meta Pixel Helper.
8.2 Regularly Testing and Validating Conversions
Test conversion tracking periodically to make sure it works.
How to Test GA4 Conversion Tracking?
- Use Debug Mode in GA4:
- Go to Google Analytics, then DebugView.
- Perform a test form submission or purchase.
- Verify that the event (form submission, purchase) fires correctly.
- Test Google Tag Manager Events:
- Open GTM Preview Mode.
- Click buttons, submit forms, and track triggered events.
- Verify Facebook Pixel Events:
- Use the Facebook Pixel Helper Chrome extension.
- Test Lead, Add-to-Cart, and Purchase events.
8.3 Monitoring Campaign Performance & Making Adjustments
Tracking conversions is an ongoing process. Use the data to optimise your marketing strategy.
Key Metrics to Track Monthly:
- Conversion Rate: % of visitors who complete an action.
- Cost Per Acquisition (CPA): How much you spend per conversion.
- Source Attribution: Which traffic channels drive the most conversions?
How to Optimise Based on Data?
- Low conversion rate? Improve page design, CTA placement, and messaging for enhanced user experience.
- High cart abandonment? Simplify the checkout process, add trust badges, and offer incentives.
- Paid ads not converting? Adjust targeting, ad creatives, and landing pages.
9. Key Concepts
Google Analytics 4 (GA4) Google's current analytics platform, replacing Universal Analytics. GA4 uses an event-based tracking model rather than session-based, making it better suited to tracking complex user journeys across devices. It is the primary tool for measuring conversions, attribution, and funnel drop-offs on Webflow sites.
Google Tag Manager (GTM) A tag management system that lets you deploy and manage tracking scripts on your Webflow site without editing the codebase directly. GTM uses triggers and tags to fire events, such as form submissions or button clicks, and send data to GA4, Google Ads, Meta Pixel, and other analytics tools.
UTM Parameters Short tracking codes added to the end of URLs that tell Google Analytics where a visitor came from. UTM parameters identify the source (e.g., Facebook), medium (e.g., paid social), and campaign name, allowing marketing teams to attribute conversions accurately to specific channels and campaigns.
Conversion Event A specific user action, such as a form submission, purchase, or button click, that has been marked as a meaningful goal in GA4. Conversion events form the basis of all attribution and ROI reporting, connecting marketing spend to real business outcomes.
A/B Testing The practice of comparing two versions of a webpage or element to determine which performs better against a defined goal. On Webflow, A/B testing is typically run through tools like Optibase or Webflow Optimize, with results measured in GA4 against conversion event data.
Key Takeaways
- Webflow's built-in form tracking captures submissions but cannot attribute where leads came from. GA4 and GTM are essential for connecting conversions to specific campaigns and channels
- The most reliable Webflow tracking setup combines GA4 (reporting), GTM (event firing), and a behavioural tool like Hotjar or Microsoft Clarity (visual user behaviour)
- Duplicate event firing, where both a hard-coded GA4 script and a GTM tag fire the same event, is one of the most common tracking errors and inflates conversion data by 100%
- UTM parameters are non-negotiable for paid and email campaigns. Without them, GA4 cannot distinguish between traffic sources and attribution becomes unreliable
- Heatmaps and session recordings add the "why" behind the data. GA4 tells you where users drop off, behavioural tools show you what's causing it
- Conversion tracking is only valuable if acted upon. Set up monthly reporting against conversion rate, CPA, and source attribution, then use the data to make specific, testable changes
.avif)
%20(1)%20(1)%20(1).avif)
.avif)
%20(1).avif)
.avif)
.avif)